


Watercolor Success: Mastering the Keys to Successful Painting.
I started my watercolor journey about ten years ago. At first, I didn’t take watercolors seriously. I created cards and worked on a children’s book, but I didn’t paint every day. Instead, I painted with watercolors maybe 1 or 2 days per month.


The images above show some of Maria’s paintings from 2014.
Then, after losing my twin brother in 2014, I started painting a bit more.
Painting became a healing therapy, something I needed to focus on while dealing with the loss of my twin. It was the most challenging time of my life ever.


The images above are some of Maria’s paintings from 2014.
In 2014, I created a short video using iMovie to capture the best moments of our time together.
Once I created my first video, I thought that maybe I could create a video while I was painting. So that’s when I created a YouTube channel.
As you might have noticed, the quality of my videos could have been better back then, but I did it.
I didn’t get many views, maybe 20, until my fifth video got over a thousand views. That also attracted thousands of new subscribers. And so that’s how my career as a teacher began. Well, it took some time to become a teacher, but now you know a little story behind it.
I achieved watercolor success without taking any classes. I’m completely self-taught.
I didn’t even watch other watercolorists paint as I was too paranoid to copy someone. This is perhaps something I got from my mom, as she’s an oil artist, and originality was something she has always told us about how important it is to have your style. At first, I painted more like an oil artist, but eventually, I got the magic of watercolors, and I fell in love with it to the point that all I wanted to do was to teach others how to paint.


The images above are Maria’s paintings from 2020.
Over the years, I taught myself how to master the two most essential techniques in watercolor: wet on wet and lifting.
These techniques made me realize how important it is to practice every day. It’s not something that can be mastered overnight, not even if you are super talented. Wet on wet has to be felt by a hand, and the trick lies in ratios between water and paint and patience when it comes down to the timing and layering of the paper. The same goes for lifting colors.
To achieve success in watercolor painting, mastering wet on wet and lifting techniques is crucial. This involves using the right ratios of water and paint and applying them to the paper at the perfect moment.


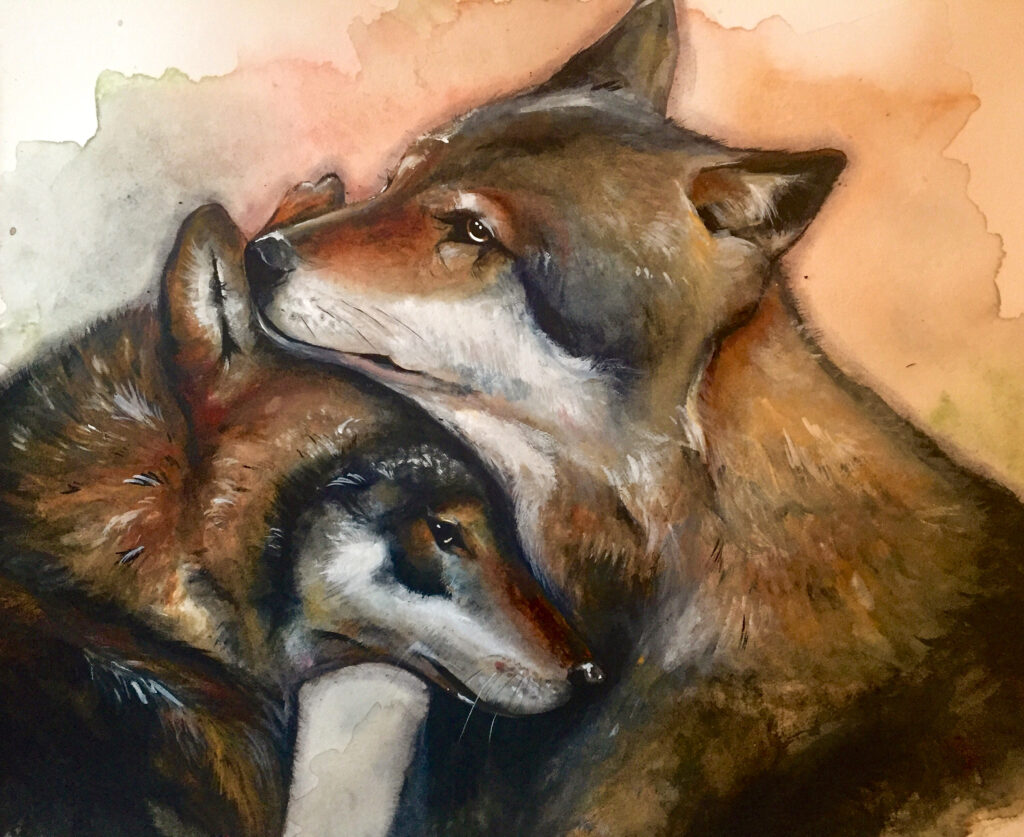
The images above are Maria’s paintings from 2024.
You can wet the paper in so many different ways. You can wet it for a minute and cover the paper enough with water, wet it for a few minutes, or even soak it in a bathtub for a few minutes. However, if you wet it for a minute, that won’t be enough, so you need to spend a few minutes massaging the paper with a wet brush to let that water get absorbed deep inside the paper.
Achieving watercolor success: How should you prepare the paper before applying the colors?
This is also a matter of how much control you want to have. What works for me is making sure that I don’t leave any paddles of water before I begin applying colors wet on wet.
If there are puddles of water, the paint will spread too much, even if I use a heavier ratio between water and paint.


The images above are Maria’s watercolor paintings from 2021-2023, all painted wet-on-wet.
Generally, I start with either a water or milk-like ratio, but the longer I apply colors to the wet paper, the more I adjust the ratio; what I mean by it is the more I decrease the amount of water in that paint on my brush.
So, at the beginning, it feels more like a water-to-milk-like ratio, but at the end of the painting, it’s more like a cream-top-like ratio between water and paint. So I have the most control, and that’s how I add more darks for contrast. Once the paper starts to feel damp, I lift colors.
A long time ago, when I first started painting with watercolors, someone gave me a book by a botanical artist. While it wasn’t my painting style because it was very detailed, I was fascinated by how the artist was able to ‘lift’ the colors. However, I couldn’t figure out the timing from the book, and it was frustrating that it lacked that information. The book only had images without any explanation. So, I kept trying on my own for the next year until I finally understood it.
The best time to lift colors is when the paper has lost its shine and feels damp.
Before you begin lifting colors, make sure to wipe your brush on a towel. If you lift too early, you may add more water to the paper or create a bloom. However, if you lift too late, nothing may happen, but this depends on the type of watercolor paper you are using.
Lifting has introduced a whole new dimension to my watercolor journey, altering my painting style, as well as the ‘wet-on-wet’ technique.
Never giving up and being consistent is important when it comes to watercolor painting. It’s crucial to spend hours practicing. Taking watercolor seriously means painting more than once or twice a week. You need to dedicate hours to practice the core techniques and gain a better understanding of how to control the paint and water.


The painting of a leaf and a flamingo above are watercolor classes on Patreon.
Find all the classes you need here.
